
The ProPico, an improved Raspberry Pi Pico board
December 19, 2023
Have you ever wondered what makes something "Pro"? Many companies use "Pro" for their most expensive products as if they actually offer any real value to professionals. Well, I believe it should offer meaningful improvements over the base model, for people who actually use these tools for work and expect appropriate performance from them.
With that being said, you all know I love the RP2040 and the Raspberry Pi Pico... but there are a few things I never understood that keep driving me crazy about it:
- The noisy DC-DC converter they chose as the main power supply. This decision alone makes any analog circuit on the rail, or even connected to the RP2040 GPIO, become insanely noisy and deliver awful performance. It also doesn't help that by default, it is driven in PFM mode which increases ripple even more.
- The bad ADC reference voltage. Sure, the ADC is not great, but it shouldn't be limited by the noisy power supply and the lack of any actual reference element. Unlike the ATMegas in Arduino boards, the RP2040 does not have any built-in reference that you can switch to, which makes this poor reference issue even worse.
- The use of a micro USB port is very inconvenient. I get that it's cheaper, but it's much more fragile and the fact that micro USB is on the way out makes it a bit of a strange choice.
- The limited flash sizes that the Pico comes with by default are also a bit inconvenient. Sure, 2MB is a lot compared to an Arduino, but considering what this chip can do, incorporating larger LUTs or similar into the flash can push it much further.
- The unreasonable difficulty associated with using the non-volatile storage during runtime. is also a massive pain for anyone who wants to store calibration data, telemetry, or states during runtime. As discussed here: https://forums.raspberrypi.com/viewtopic.php?t=311633
- The lack of a reset button. This is a wild one. How the people developing this board didn't get annoyed by not having a reset button is beyond me.
And I am not the only one who thinks this way. I have talked to many people who share my displeasure with these aspects of the Pi Pico, but the form factor and the ability to easily integrate it into your design is undeniably nice. So, on a cold October evening, I set out to make my own Pico board. It should stay affordable and not be too bloated, while remaining compatible with the original Pi Pico in terms of software and footprint, and most importantly, it needs to address the points above.
 So, let's go over the solutions in the same order:
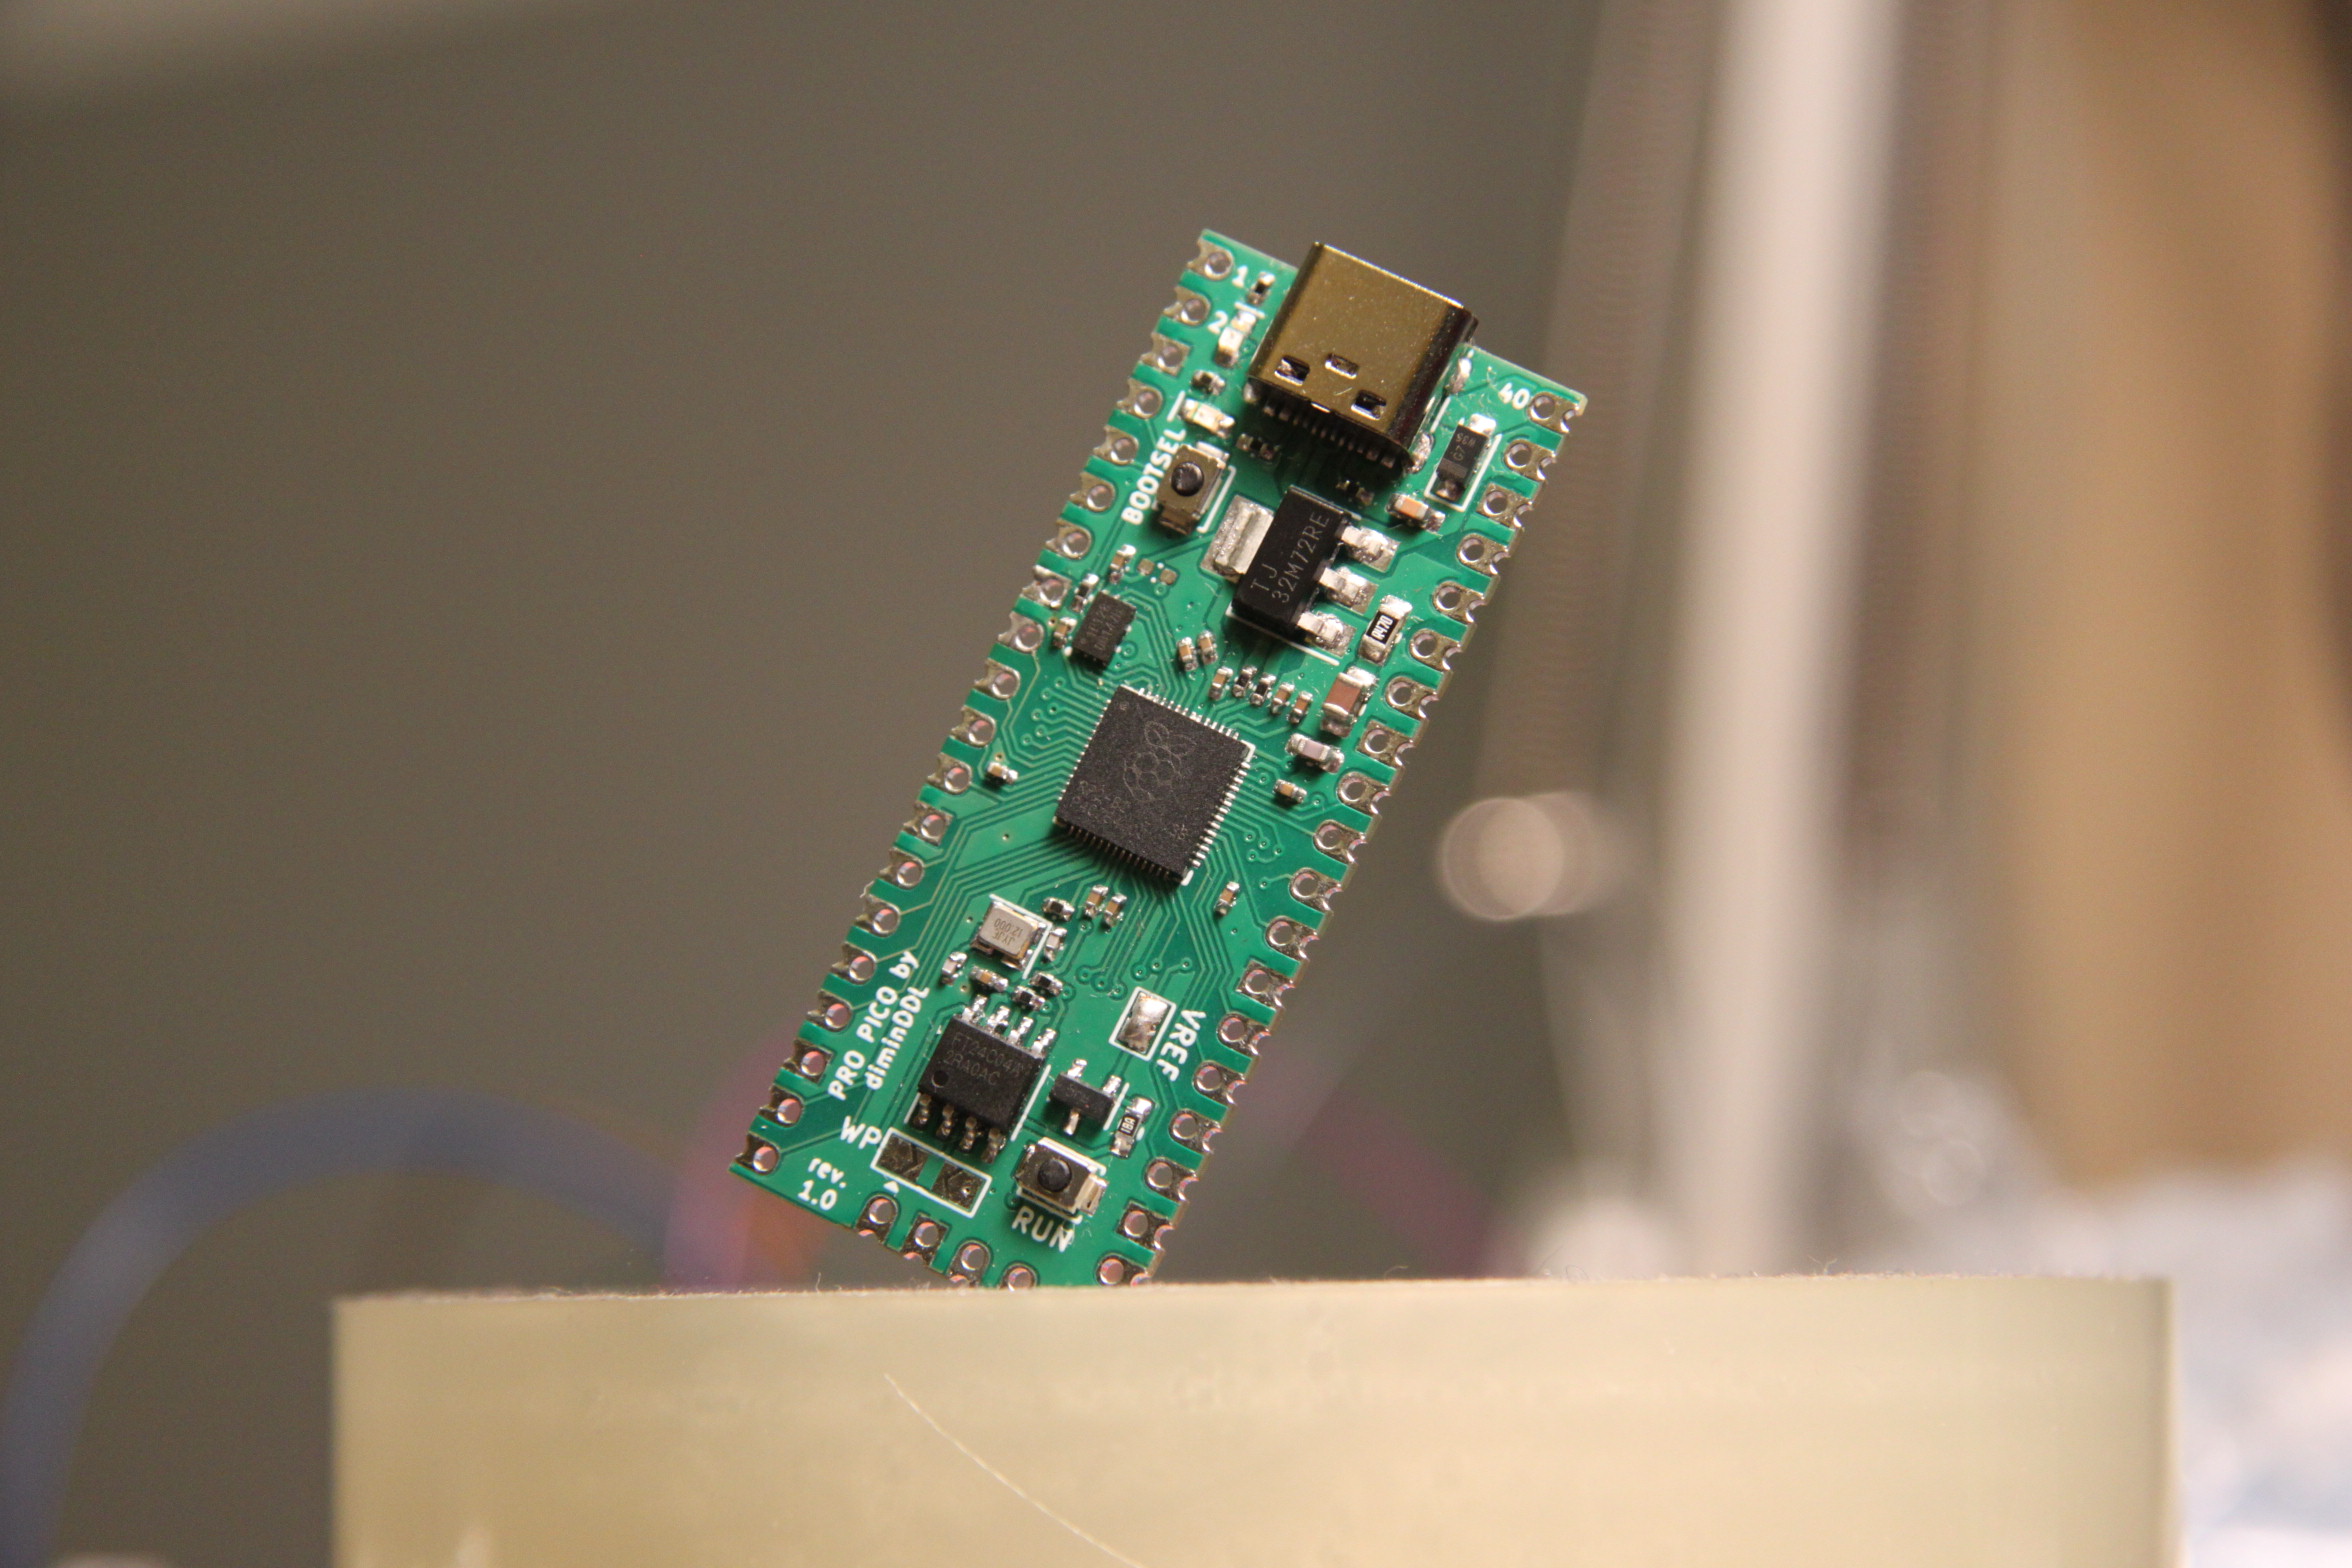
- The DC-DC converter has been replaced with a linear TLV761 or TLV1117 (or any other pin-compatible) LDO. It has the same output current rating as the DC-DC, provided it is kept sufficiently cool. In the case of the TLV1117, a small series resistor must be placed before the LDO output bypass capacitor, because this type of LDO was not designed with low ESR in mind. With the TLV761, a short is placed instead of a resistor.
- Also, there is now a proper ADC reference onboard. Built around the LM4040 3V variant, this reference can be easily enabled or disabled by the end user with a nice and big jumper instead of the 0603 resistor used on the Pico.
- The micro USB has been replaced with a Type-C port including CC resistors, so it can be used with modern C to C cables.
- Since the EEPROM chips used on the original Pico come in up to 16MByte variants and can be populated as a drop-in replacement, I added a binary indicator on the back to more easily distinguish which board has what.
- On the topic of memory, a generic i2c flash chip footprint has been added. The user can even choose to populate something like FRAM in order to treat this as a logging or non-volatile state memory, allowing recovery after a power failure. There is also a jumper for the write protect pin of the chip in case you want to lock things like calibration values or similar.
- I also tried to preserve the test point locations and connections, but due to the different port and layout, they were slightly shifted, some functions changed, and I added a new one for the core voltage line, in case you want to monitor that or do some out-of-spec overclocking experiments.
- And of course, I didn't forget about it; both boot select and reset buttons, conveniently located far enough apart for you to be able to press one at a time.
As you can tell from the image at the start, I've already assembled some of these, and so far, it is able to overclock and perform the same way as the Pi Picos I have, meaning I didn't mess up the bypass capacitors. Currently, I am still working on finalizing the design, supporting libraries and board files. You can track the progress on the GitHub page.
Here is the current version of the pinout, provided in the same convenient graphic as the original. Thank you to everyone who helped me with this project and the Raspberry Pi Foundation for making such an awesome chip and (imperfect but still nice) board and support for it.

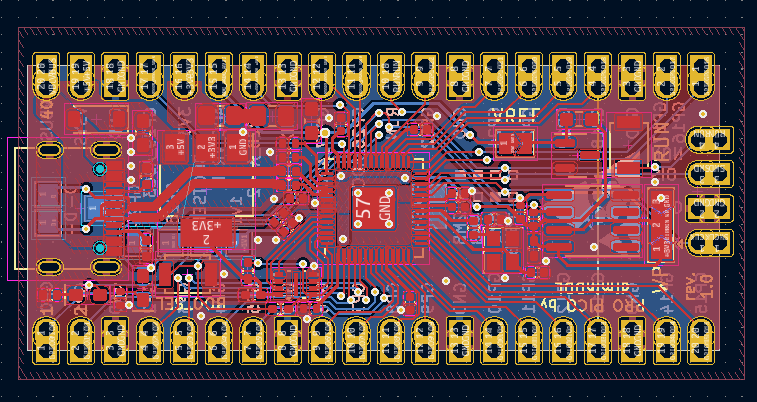
Oh and as a test below is an interactive schematic and board viewer, so you can see the design in more detail. These are pulled
straight from the GitHub, so they should be up to date.
Powered by KiCanvas, note that KiCanvas is still in alpha, so it may not work
perfectly
Accompanying YouTube video:
